Associating Multiple Textures
From Mod Wiki
| Revision as of 02:55, 30 July 2010 (edit) ManIK (Talk | contribs) ← Previous diff |
Revision as of 02:57, 30 July 2010 (edit) (undo) ManIK (Talk | contribs) Next diff → |
||
| Line 86: | Line 86: | ||
| har-har. | har-har. | ||
| - | [[Category: | + | [[Category:Articles]] |
Revision as of 02:57, 30 July 2010
This write-up will attempt to explain how to set-up a new textures for use on a duplicated mesh. I say 'duplicated mesh' specifically because it requires a new mesh of the same type in order to work.
For this we will attempt to make 1 new associations inside the mesh file to a new texture. We want the game to continue using the old texture on the original mesh so we will have to duplicate the original mesh in order to associate it with the new texture.
This is not to be confused with 'texture-replacing' which is creating a new texture, using GSC's naming convention and the engine programmatically uses it for it associated mesh. All you've done is create a new texture which replaces the old one but the mesh is the same so that one mesh will always display that new texture over and over again. This is not that. This is a new texture for a new mesh. So when the game loads up the two meshes (even thought they are the same mesh, they are two different files) it will be displaying one or the other texture/or both, depending on how you set-up that part). This is ideal for outfit and weapon mods where you want to have multiple variants to spawn over time and avoid getting duplication.
Contents |
You need a HEX Editor
In order to get a mesh to properly associate itself with a texture, it needs to have a specific string edited. So for this, you will need a HEX editor. I use HEX Workshop for Windows: [1].
Prepping the files
You'll need to get a copy of the mesh, its thm file, (along with your new dds) and a copy of the character_desc_general.xml and set them all inside their appropriate directories in your /gamedata folder.
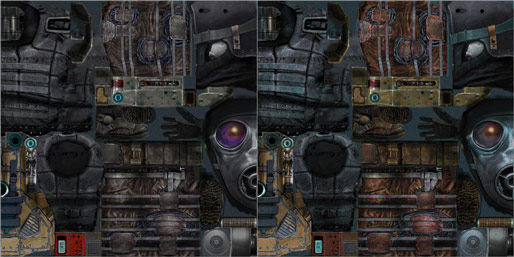
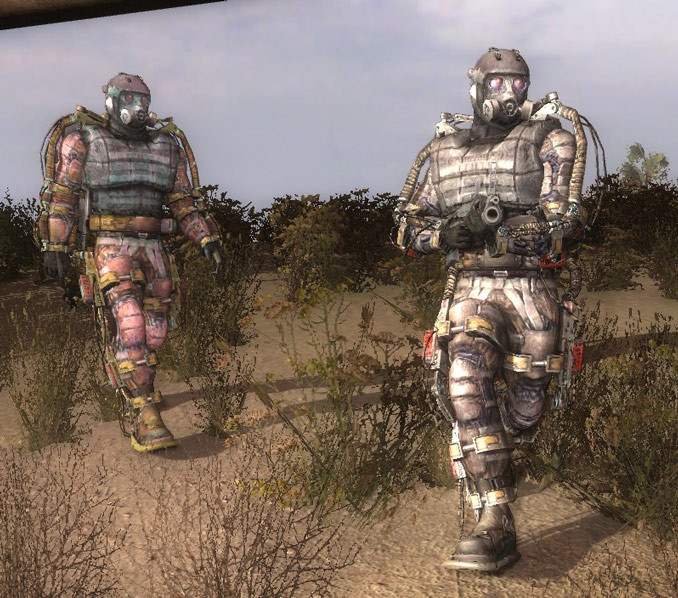
For this (feel free to follow along with me) I want to have two variations of the act_stalker_neutral_4.dds texture for the game to choose from.
The one on the left is the current default which will remain and the one on the right is the new one I want the game to use as well.
I will grab a copy of the act_stalker_neutral_4.thm and place it inside the same directory as the new texture. I will copy the stalker_neutral_4.ogf and place it inside the meshes/actor/stalker_neutral directory.
Hex Editing
Naming Convention
Since we must HEX edit the new texture name inside the new mesh, we are limited in that the character count of the new texture name must be equal to the default character count of the old texture name.
The original file is called act_stalker_neutral_4.dds and the new file will be named act_stalker_neutral4b.dds.
Launch Hex Workshop > File > navigate to the copied ogf mesh, stalker_neutral_4.ogf, then open it.
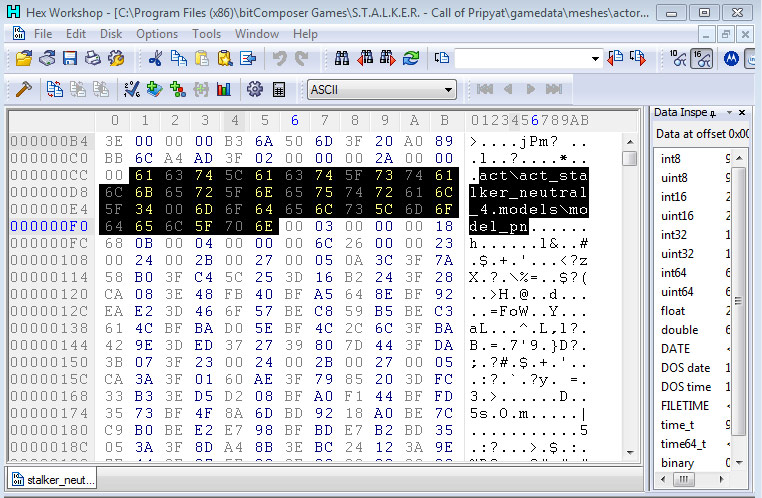
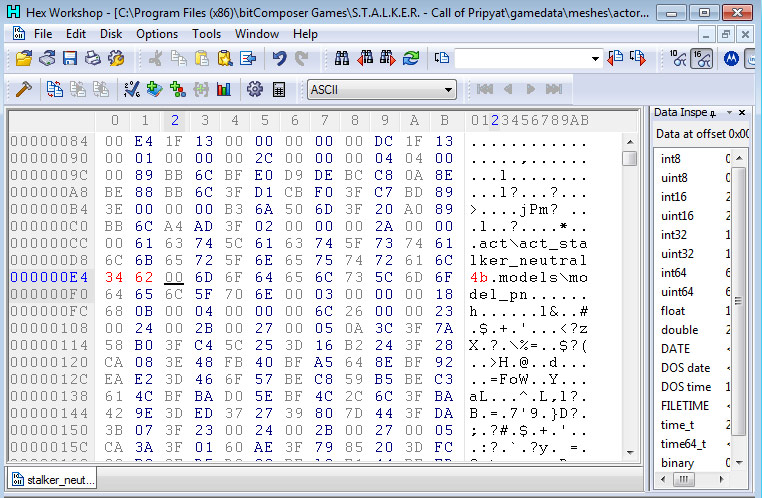
Right at the head of the file, about a dozen or so lines down from the top, you'll see the string we want in the right-side of the middle pane. Scroll down until you can see act\act_stalker_neutral_4.models\model_pn
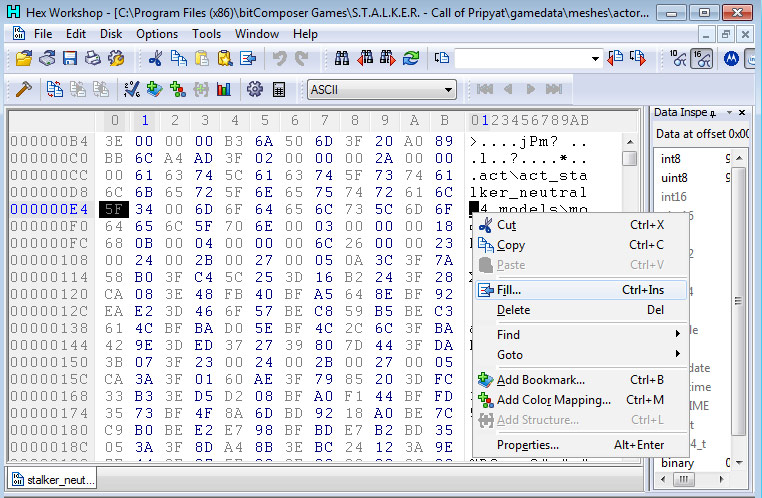
All we want to do is replace the '_' with a '4' and the original '4' with a 'b'. Drag over the '_' and right-click > then select Fill:
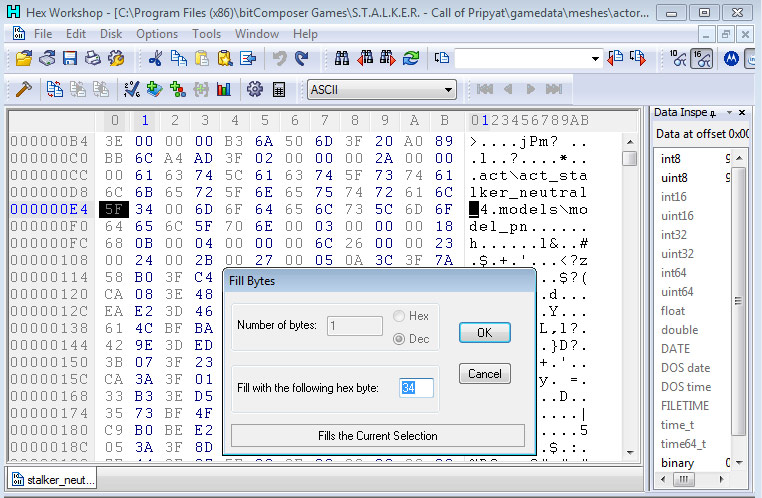
With the new window open, we need to change the '_' into a 4. Since there is a 4 beside it, I can see in the left-side middle pane that the byte value for '4' is '34' so replace the old value with '34' then hit okay.
Then do the same thing for 'b' (which is '62' btw)
And you'll have your new value set. Notice how all I did was removed the underscore and added a letter, 'B'. The character count is still the same. It is extremely important that you not change the character count for your new texture name inside the new mesh. Once you're done, overwrite your original-copied ogf with this new version and that's that; close the hex editor.
Before we move on from the mesh, however, we have to rename the copied mesh. If we keep the original name, the game will use it to replace the original - which is not what we want - we want the new mesh to stand on its own. Call it stalker_neutral4b.ogf to maintain some consistency and make it easier to remember.
Next, we want to grab the .thm file. The mesh will be looking for the thm file to associate a bump.dds so we need to make sure we have one there for it to use, whether you're using a new bump or not. Using the *same naming convention of our new texture*, we will name it: act_stalker_neutral4b.thm --- If you are using a new bump.dds file that is not the original, or you would like to have multiple bumps for multiple textures, you will need to HEX edit the thm file and change the name of its associated file in a similar fashion as you did changing the mesh. In this case, the thm file string is act\act_stalker_dolg_4_bump but we don't need to change that since we're not making a new bump for the neutral4 stalker. It can use the same bump as the rest of them - all we need to do is make sure we have its proper thm file on hand using the same naming convention we used for the diffuse.
Okay so we have the new mesh, edited, renamed and ready, the new thm, renamed and ready, our new texture named properly and waiting - all we have to do now is tell the game: "hey use this mesh too!"
The character_desc_general.xml
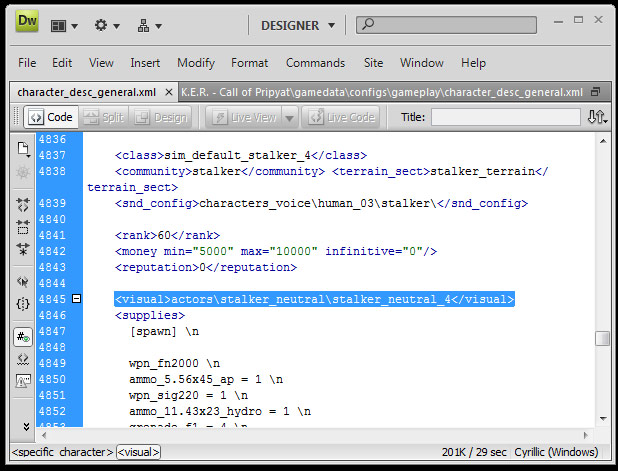
This part is fairly easy. Upon opening the file, you'll find it's full of basic character desciptions for the default spawns with pointers to other files. It's easy to see that, along with the new mesh we're going to associate a few profiles to, you can also tweak those profiles with different load-out, voice etc etc which is great if you want to have one texture set associated with a specific load-out - but that's outside the scope of this write-up - all we're interested in is this one line inside the <visual> tag-
That one line is what is associating that profile to the mesh. So all we need to do is set-up a new association to point to our new mesh. Change that line from: actors\stalker_soldier\stalker_neutral_4 which is the default, into actors\stalker_soldier\stalker_neutral4b which is our new HEX edited mesh, then save.
That's it.
You're done!
... and, no. I won't be keeping that texture in-game (;
har-har.
