AI Map Creating
From Mod Wiki
| Revision as of 17:55, 15 July 2008 (edit) Dezodor (Talk | contribs) ← Previous diff |
Revision as of 18:19, 15 July 2008 (edit) (undo) Atrocious (Talk | contribs) (new image positions) Next diff → |
||
| Line 1: | Line 1: | ||
| - | '''Creating AI Map in SDK Level Editor''' | ||
| - | |||
| - | |||
| Here is a step by step tutorial, and added images, and explanation to each image. I hope it will help you to realize how it works, and to successfully create your own AI map for your new sp level. | Here is a step by step tutorial, and added images, and explanation to each image. I hope it will help you to realize how it works, and to successfully create your own AI map for your new sp level. | ||
| Creating AI Map is needed for single player levels only. If you make multiplayer level, you can skip this article. AI Map controls the npc and creatures movement on the level. When you finished the base of your map, you placed every object you wanted to, then: | Creating AI Map is needed for single player levels only. If you make multiplayer level, you can skip this article. AI Map controls the npc and creatures movement on the level. When you finished the base of your map, you placed every object you wanted to, then: | ||
| + | __NOTOC__ | ||
| - | + | [[Image:1aimap.JPG|left|thumb]] | |
| - | + | ===Step 1:=== | |
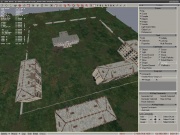
| This is a simple map, just for presentating the AI grids. As you see, it has borders (fence). Also you can see on the right panel, the aimap button, so select it. (it's highlighted with white color) | This is a simple map, just for presentating the AI grids. As you see, it has borders (fence). Also you can see on the right panel, the aimap button, so select it. (it's highlighted with white color) | ||
| + | {{clear}} | ||
| - | [[Image:1aimap.JPG|center|thumb]] | ||
| - | |||
| - | |||
| - | '''Step 2:''' | ||
| + | [[Image:2aimap.JPG|left|thumb]] | ||
| + | ===Step 2:=== | ||
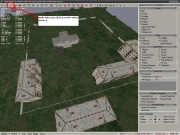
| After you selected it, make sure you clicked on the arrow button at the upper panel (see the image) | After you selected it, make sure you clicked on the arrow button at the upper panel (see the image) | ||
| + | {{clear}} | ||
| - | [[Image:2aimap.JPG|center|thumb]] | ||
| - | |||
| - | |||
| - | '''Step 3:''' | ||
| + | [[Image:3aimap.JPG|left|thumb]] | ||
| + | ===Step 3:=== | ||
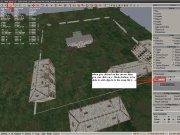
| When you are done, you can click on the snaps list +/- add button, and start to add the objects to the snaps list (see the image) | When you are done, you can click on the snaps list +/- add button, and start to add the objects to the snaps list (see the image) | ||
| + | {{clear}} | ||
| - | [[Image:3aimap.JPG|center|thumb]] | ||
| - | |||
| - | |||
| - | '''Step 4:''' | ||
| + | [[Image:4aimap.JPG|left|thumb]] | ||
| + | ===Step 4:=== | ||
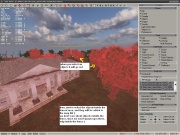
| When you select an object, it will be added to that list, and will get red color, so you will know, that you already added it. However, adding objects outside the fenced area, is not needed, since you will only spawn npcs inside the level, and of course do not forget to select the fence objects too, so npcs will not try to go through them :) (see the image) | When you select an object, it will be added to that list, and will get red color, so you will know, that you already added it. However, adding objects outside the fenced area, is not needed, since you will only spawn npcs inside the level, and of course do not forget to select the fence objects too, so npcs will not try to go through them :) (see the image) | ||
| + | {{clear}} | ||
| - | [[Image:4aimap.JPG|center|thumb]] | ||
| - | |||
| - | |||
| - | '''Step 5:''' | ||
| + | [[Image:5aimap.JPG|left|thumb]] | ||
| + | ===Step 5:=== | ||
| When you selected all needed objects on the level, you need to place at least one ai node by hand on the map. So click on the bucket "add" icon at the upper panel. (see the image) | When you selected all needed objects on the level, you need to place at least one ai node by hand on the map. So click on the bucket "add" icon at the upper panel. (see the image) | ||
| + | {{clear}} | ||
| - | [[Image:5aimap.JPG|center|thumb]] | ||
| - | |||
| - | |||
| - | '''Step 6:''' | ||
| + | [[Image:6aimap.JPG|left|thumb]] | ||
| + | ===Step 6:=== | ||
| Click on "add" button again at the ai map nodes panel, and choose an ai map symbol and place it on the map. (see the image) | Click on "add" button again at the ai map nodes panel, and choose an ai map symbol and place it on the map. (see the image) | ||
| + | {{clear}} | ||
| - | [[Image:6aimap.JPG|center|thumb]] | ||
| - | |||
| - | |||
| - | '''Step 7:''' | ||
| + | [[Image:7aimap.JPG|left|thumb]] | ||
| + | ===Step 7:=== | ||
| Now that you placed an AI Node, and you added the needed objects to the Snaps list, you can generate AI Map. Click on "generate full" at the AI Map panel. This can be a long process, if you made a big map, also it depends on your pc. When it is done, you can switch back to "object" mode, so the red colors disappear from the map! (see the image) | Now that you placed an AI Node, and you added the needed objects to the Snaps list, you can generate AI Map. Click on "generate full" at the AI Map panel. This can be a long process, if you made a big map, also it depends on your pc. When it is done, you can switch back to "object" mode, so the red colors disappear from the map! (see the image) | ||
| - | |||
| - | [[Image:7aimap.JPG|center|thumb]] | ||
| - | |||
| add: you can disable ai map after it's generated, because it can be annoying to see the nodes everywhere all the time. To do that, switch back to ai map section, go to properties, and click on show ai grid, and it will turn it off. To turn it on, click on it again. | add: you can disable ai map after it's generated, because it can be annoying to see the nodes everywhere all the time. To do that, switch back to ai map section, go to properties, and click on show ai grid, and it will turn it off. To turn it on, click on it again. | ||
| + | {{clear}} | ||
| - | + | [[Image:8aimap.JPG|left|thumb]] | |
| - | + | ===Step 8:=== | |
| - | + | ||
| Now the AI Map is done, you see, it was generated properly, so npcs wont try to go through the walls. | Now the AI Map is done, you see, it was generated properly, so npcs wont try to go through the walls. | ||
| + | {{clear}} | ||
| - | [[Image:8aimap.JPG|center|thumb]] | ||
| - | Congratulations! Now you can build your map, and compile it. Later with Neo]['s or Bardak's ai compilers you can | + | Congratulations! Now you can build your map, and compile it. Later with Neo]['s or Bardak's ai compilers you can build your single player map :) |
| - | + | ===Extra Tips:=== | |
| - | + | [[Image:9aimap.JPG|left|thumb]] | |
| I am sure, you noticed, that stalkers like to go in the fire, maybe the weather is too cold for them? No it's not. The problem is, aimap generation fails at low objects, like fireplaces. To avoid these issues, try this, and it will help to make proper new level: | I am sure, you noticed, that stalkers like to go in the fire, maybe the weather is too cold for them? No it's not. The problem is, aimap generation fails at low objects, like fireplaces. To avoid these issues, try this, and it will help to make proper new level: | ||
| As you can see in this image, the ai map fails, and npcs can go to the fireplace. To avoid it, you need to put a bigger object to that place where you plan to add fire later. A simple bush, or barrel does the trick. (see the image) | As you can see in this image, the ai map fails, and npcs can go to the fireplace. To avoid it, you need to put a bigger object to that place where you plan to add fire later. A simple bush, or barrel does the trick. (see the image) | ||
| - | + | {{clear}} | |
| - | + | ||
| + | [[Image:10aimap.JPG|left|thumb]] | ||
| Now the AI Map generation is complete again, and you see, the AI Map won't fail this time. You can simply remove the bush now, it's not needed anymore. (see the image) | Now the AI Map generation is complete again, and you see, the AI Map won't fail this time. You can simply remove the bush now, it's not needed anymore. (see the image) | ||
| - | + | {{clear}} | |
| - | + | ||
| + | [[Image:11aimap.JPG|left|thumb]] | ||
| Put back the fireplace, and it's done (see the image) | Put back the fireplace, and it's done (see the image) | ||
| - | + | {{clear}} | |
| - | + | ||
Revision as of 18:19, 15 July 2008
Here is a step by step tutorial, and added images, and explanation to each image. I hope it will help you to realize how it works, and to successfully create your own AI map for your new sp level.
Creating AI Map is needed for single player levels only. If you make multiplayer level, you can skip this article. AI Map controls the npc and creatures movement on the level. When you finished the base of your map, you placed every object you wanted to, then:
Step 1:
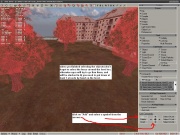
This is a simple map, just for presentating the AI grids. As you see, it has borders (fence). Also you can see on the right panel, the aimap button, so select it. (it's highlighted with white color)
Step 2:
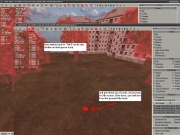
After you selected it, make sure you clicked on the arrow button at the upper panel (see the image)
Step 3:
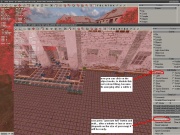
When you are done, you can click on the snaps list +/- add button, and start to add the objects to the snaps list (see the image)
Step 4:
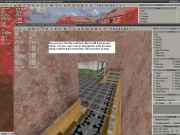
When you select an object, it will be added to that list, and will get red color, so you will know, that you already added it. However, adding objects outside the fenced area, is not needed, since you will only spawn npcs inside the level, and of course do not forget to select the fence objects too, so npcs will not try to go through them :) (see the image)
Step 5:
When you selected all needed objects on the level, you need to place at least one ai node by hand on the map. So click on the bucket "add" icon at the upper panel. (see the image)
Step 6:
Click on "add" button again at the ai map nodes panel, and choose an ai map symbol and place it on the map. (see the image)
Step 7:
Now that you placed an AI Node, and you added the needed objects to the Snaps list, you can generate AI Map. Click on "generate full" at the AI Map panel. This can be a long process, if you made a big map, also it depends on your pc. When it is done, you can switch back to "object" mode, so the red colors disappear from the map! (see the image)
add: you can disable ai map after it's generated, because it can be annoying to see the nodes everywhere all the time. To do that, switch back to ai map section, go to properties, and click on show ai grid, and it will turn it off. To turn it on, click on it again.
Step 8:
Now the AI Map is done, you see, it was generated properly, so npcs wont try to go through the walls.
Congratulations! Now you can build your map, and compile it. Later with Neo]['s or Bardak's ai compilers you can build your single player map :)
Extra Tips:
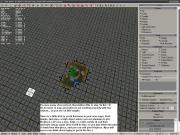
I am sure, you noticed, that stalkers like to go in the fire, maybe the weather is too cold for them? No it's not. The problem is, aimap generation fails at low objects, like fireplaces. To avoid these issues, try this, and it will help to make proper new level:
As you can see in this image, the ai map fails, and npcs can go to the fireplace. To avoid it, you need to put a bigger object to that place where you plan to add fire later. A simple bush, or barrel does the trick. (see the image)
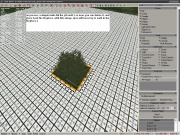
Now the AI Map generation is complete again, and you see, the AI Map won't fail this time. You can simply remove the bush now, it's not needed anymore. (see the image)
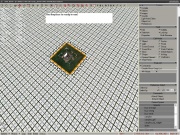
Put back the fireplace, and it's done (see the image)
I hope i could help :) Good luck with your sp map!
